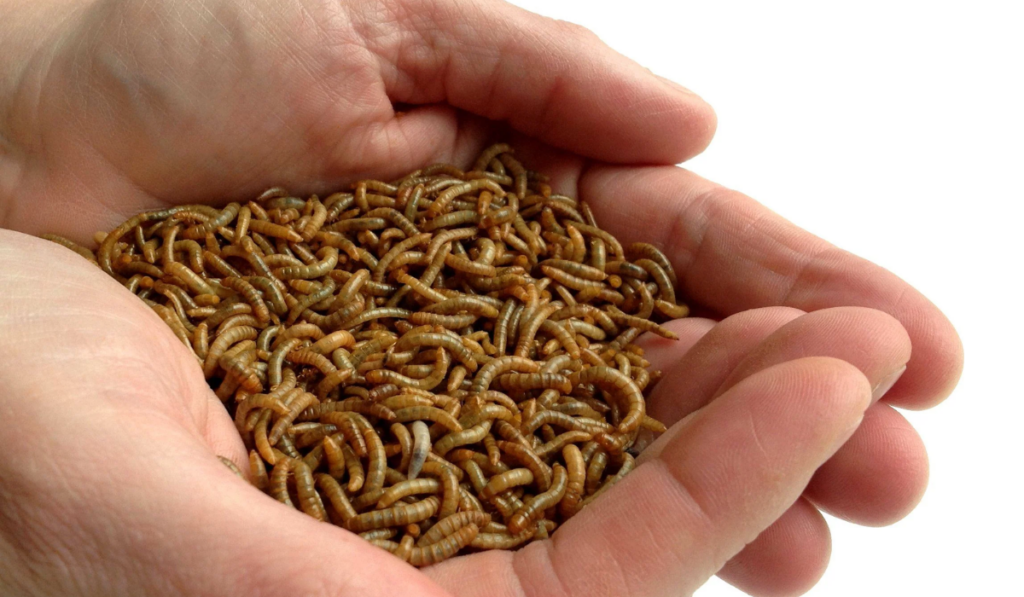
Mealworms are a popular food choice for many animals. Whether you have pet reptiles, chickens, or feed your backyard birds, raising your own mealworms is an easy way to save a LOT of money. Today I’ll be explaining exactly how to farm mealworms so that you can feed all of your animals without spending hundreds of dollars every year.
There are lots of different ways to grow your own mealworms. Over the last 10+ years of keeping reptiles, I have tried a TON of these methods and below I’ll share the one that has worked the best for me and my pets. You can copy this guide word for word, or use it as inspiration for a mealworm colony that works best for you.
Understanding the Mealworm Lifecycle
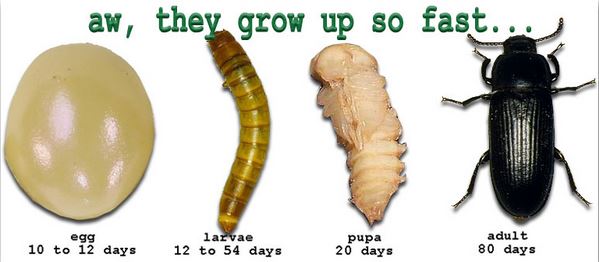
Before you can get started in raising your own mealworms, you must understand the full mealworm lifecycle. Knowing the full mealworm lifecycle is one of the most important things to keeping these insects successfully. Mealworms are the larval form of a darkling beetle. These worms go through a complete metamorphosis, meaning that they have distinct stages in their life cycle.

Mealworms start out as eggs, and take anywhere from 4-30+ days to hatch. Once they hatch, mealworms start out as tiny tiny worms slowly growing into the bigger worms you can feed off to your animals. This growing phase can take over 10 weeks, and the larvae will continue to grow and molt several times as they eat and develop. Once they are ready, the mealworms will burrow down below the surface of your grain and shed their exoskeleton one last time. The larva will turn soft, stop moving and curl into a C shape, then transform into a white or yellowish pupae. Pupae do not eat or move much, and this stage of their growth can last 6-20 days. After they complete their metamorphosis, the pupa will turn into darkling beetles. These beetles are light brown when they first emerge, but turn dark brown/black after a few days. The beetles cannot fly and males and females look identical. Darkling beetles start to lay their eggs 9-20 days after their emergence. They lay eggs for a few months, and then they die. They cycle begins again as the eggs hatch into tiny whitish worms, which may not be seen easily for several weeks until they grow bigger.
Step 1: Sourcing Your Mealworms
To start your colony, you must first obtain an intial supply of live mealworms. I recommend starting with 500-1000 mealworms to get your mealworm farm going – the more worms you start with, the faster you will have a new stock. You can buy mealworms at your local petstore, wild bird feed store or even online.
Avoid buying Giant Mealworms or Super worms. These worms may have been treated with an insect growth hormone to increase the worm size and prevent them from morphing into beetles. Superworms treated with this hormone are sterile and will not reproduce.
Step 2: Get your Mealworm Bin
In my opinion, the easiest way to raise your own mealworms is in a sterilite drawer bin setup. Get a 3, 4 or 5 tiered drawer system that is plastic and easy to clean (they can be found at walmart, target or even online). Each drawer will be used to separate your mealworm life stages and ensure your worms grow successfully.

Step 3: Fill Your Bin
Mealworms, in their worm form, have two goals. They want to eat, and they want to burrow. These two tasks are really all they are designed to do at this point in their life stage. To make them happy, I recommend filling your bins with something they can eat and burrow into at the same time. Personally I used rolled oats but you can also use wheat bran, oat bran, cornmeal and more. Use this as your “substrate” and fill each drawer with half an inch to one inch of oats. As long as the larvae are 1″ or more below the top of the container, they can’t get out.
Once your drawer system is setup, take your mealworms and dump them into the top most drawer.
Step 4: Feed Your Worms
While your mealworms and beetles will eat the bedding of your choice, it is still a good idea to offer a variety of food options for your insects. The more nutritious the food, the more nutritious the mealworms will be for your pets. Offering a variety of sliced fruits and vegetables, fish food, and more will keep your worms healthy and happy. Fresh fruits and vegetables are also a great water source for your bugs. I try to feed my worm colony 2 or 3 times a week – putting a few pieces of sliced veggie into each try and removing any old/uneaten food.
Step 5: Maintaining Your Colony
While you are waiting for your initial worms to start turning into beetles, you can leave everyone in the top tray of the drawer system. Once the worms turn into pupae, move the pupae into a seperate drawer to prevent the mealworms from eating them. These pupae will hatch into beetles, and overtime the beetles will lay eggs in the second tray. Once you notice there is new larvae (mealworms) in the beetle tray, you will need to move all the beetles and pupae to the bottom/third drawer tray. If you fail to separate them, the beetles will feed on the young mealworms, and the bigger mealworms will feed on the pupae. When you move the beetles/pupae to the next drawer, they will lay more eggs and continue the reproduction process. Eventually you will start the cycle over again by moving the beetles/pupae to the top drawer.
Step 6: Cleaning
Remove dead mealworms, pupae and beetles regularly.
Once the life cycle has completed in the top drawer, the bedding will be depeleted and become fowl. You can use a mesh strainer to sift out the remaining oats and worms. The worm/beetle waste will fall through the sifter and can be thrown away, or used as a healthy plant fertilizer. Replace the remaining oats and worms to their drawer, and top off with more oats or substrate if needed.
Other Advice
I highly recommend occasionally adding genetic stock to your mealworm colony to prevent inbreeding. Once or twice a year, I will buy a fresh group of mealworms from my local pet/bird store and add them to my mealworm bin. This will lead to your entire colony being healthier, and your animals will be healthier too.
You can also add supplements to your bin to produce fatter and healthier worms. Sprinkle supplements into the bedding, or onto the fruits/veggies you are feeding. Examples of supplements are ZooPro High Protein Supplement, calcium supplement (or finely ground egg shells), wheat germ, fish flakes, or dry brewer’s yeast (provides proteins).
I hope this tutorial was helpful in getting your mealworm colony setup! Breeding and maintaining your colony is an easy way to save money when keeping exotic pets, or feeding backyard bird, however it still requires regular attention and care. If you follow the above advice, your mealworm farm should start producing within the first 3-4 months, and you will have a fresh and healthy supply of worms on hand for your animals.
Please let me know if you have any questions! I always try to read and reply to any comments.
Looking for more information on Exotic Pet Care? Browse our archive of articles!


